2. Telephony and use
Incoming calls
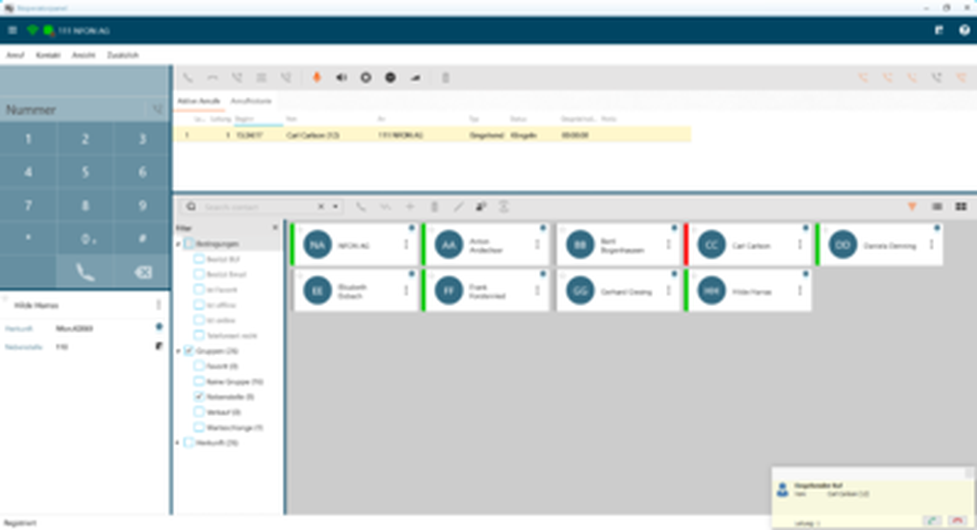
Incoming calls appear yellow under "active calls" and are also indicated by the pop-up at the lower right edge of the screen.
Incoming calls can be answered or declined as follows:
- using the menu bar above the active calls
- directly via the pop-up
- using a hotkey
- using a compatible headset

An answered call will be green in the list, thus displayed as active.

When putting an active call on "hold", the call will be light green in the list.

Outgoing calls
An outgoing call will be grey when ringing.

When an outgoing call is connected, it turns green in the list, thus displayed as active.

Transfer call
There are two options for forwarding calls:
- You can drag & drop a call directly over a contact, thus forwarding it blindly.

- You can connect two active calls by putting one of the calls on hold and dragging the held call over the active call. This corresponds to an announced call transfer.

Call Pick-Up
- Log into the service portal.
- Add a group under targets.
- Define the group as Pick-Up group.
The extensions you want to be able to pick-up calls from must be added to this pick-up group.
- Under "Advanced Settings" in the NOP go to "My Account" – "Dialling rules".
- Activate the pick-up prefix.
Now when a call is forwarded but not answered (yellow BLF does not turn red), the NOP can pick up the call.

There are two options for picking up:
- Double-click the contact with the yellow BLF.
- Move the mouse to "Answer” to pick up the unanswered call.

Conference
There are two options for starting a conference call. In both cases, the NOP must have at least two calls (either active or on hold).
- Start the conference by setting the held calls to active.
- Start a conference by pressing the conference call symbol.
The difference is that the conference call symbol adds all calls on hold to a conference call.

Main phonebook
The contacts from the main phonebook can be found in the directory section at the bottom of the NOP.
Local phonebook
You can add, save and export personal contacts in the NOP.
- Click Contact at the top menu bar, then click new.

Call history
The NOP has a detailed call history. This lists all calls.
It shows
- who called the operator,
- who the operator called,
- who the operator transferred to
- or if calls were for example rejected or unanswered.
The call history also shows the time the call started, the duration of the call and any notes added during the call.
You will find the call history at the top of the main section under the tab with the same name.
Click "More" in the menu bar to export the call history to a CSV file.
Custom groups
Default groups such as extensions and favourites are included.
However, you can also add custom groups to suit your needs.
- To do so, click the three dots on a contact in tile view or right-click on a contact in list view.
- Move the mouse to "groups" and click on the desired configured group.
If you do not see a suitable group, click "edit group".
Here you can add a new group or edit or delete existing groups. Initially, all system extensions are automatically assigned to the "Extension" group.

Filter
A filter (below the contact search field) allows you to quickly find extensions in a group and also filter for conditions such as "Busy BLF" and "online".
After closing the "Filter" field it can be opened again at any time.
- To do so, go to the menu bar under View, move the mouse to Contacts and click Filter.
The filter screen will now appear to the left of the contacts again.
Hotkeys
Under "Shortcuts - Settings - Shortcut keys" you can configure which functions you want specific keys to execute.
- Configure your shortcut key by executing these after selecting the respective field,
or "Edit as text" at the bottom right activate and enter the respective commands manually.
Multi Select
Multi Select allows you to select several entries at once.
- To use the selection mode, go to Contact in the top menu bar and select “Select all".
This will open the following help menu at the bottom right edge of the screen:
 Symbol: Go back, cancel selection
 Symbol: alle Einträge markieren
 Symbol: Deselect all
 Symbol: Reverse selection


